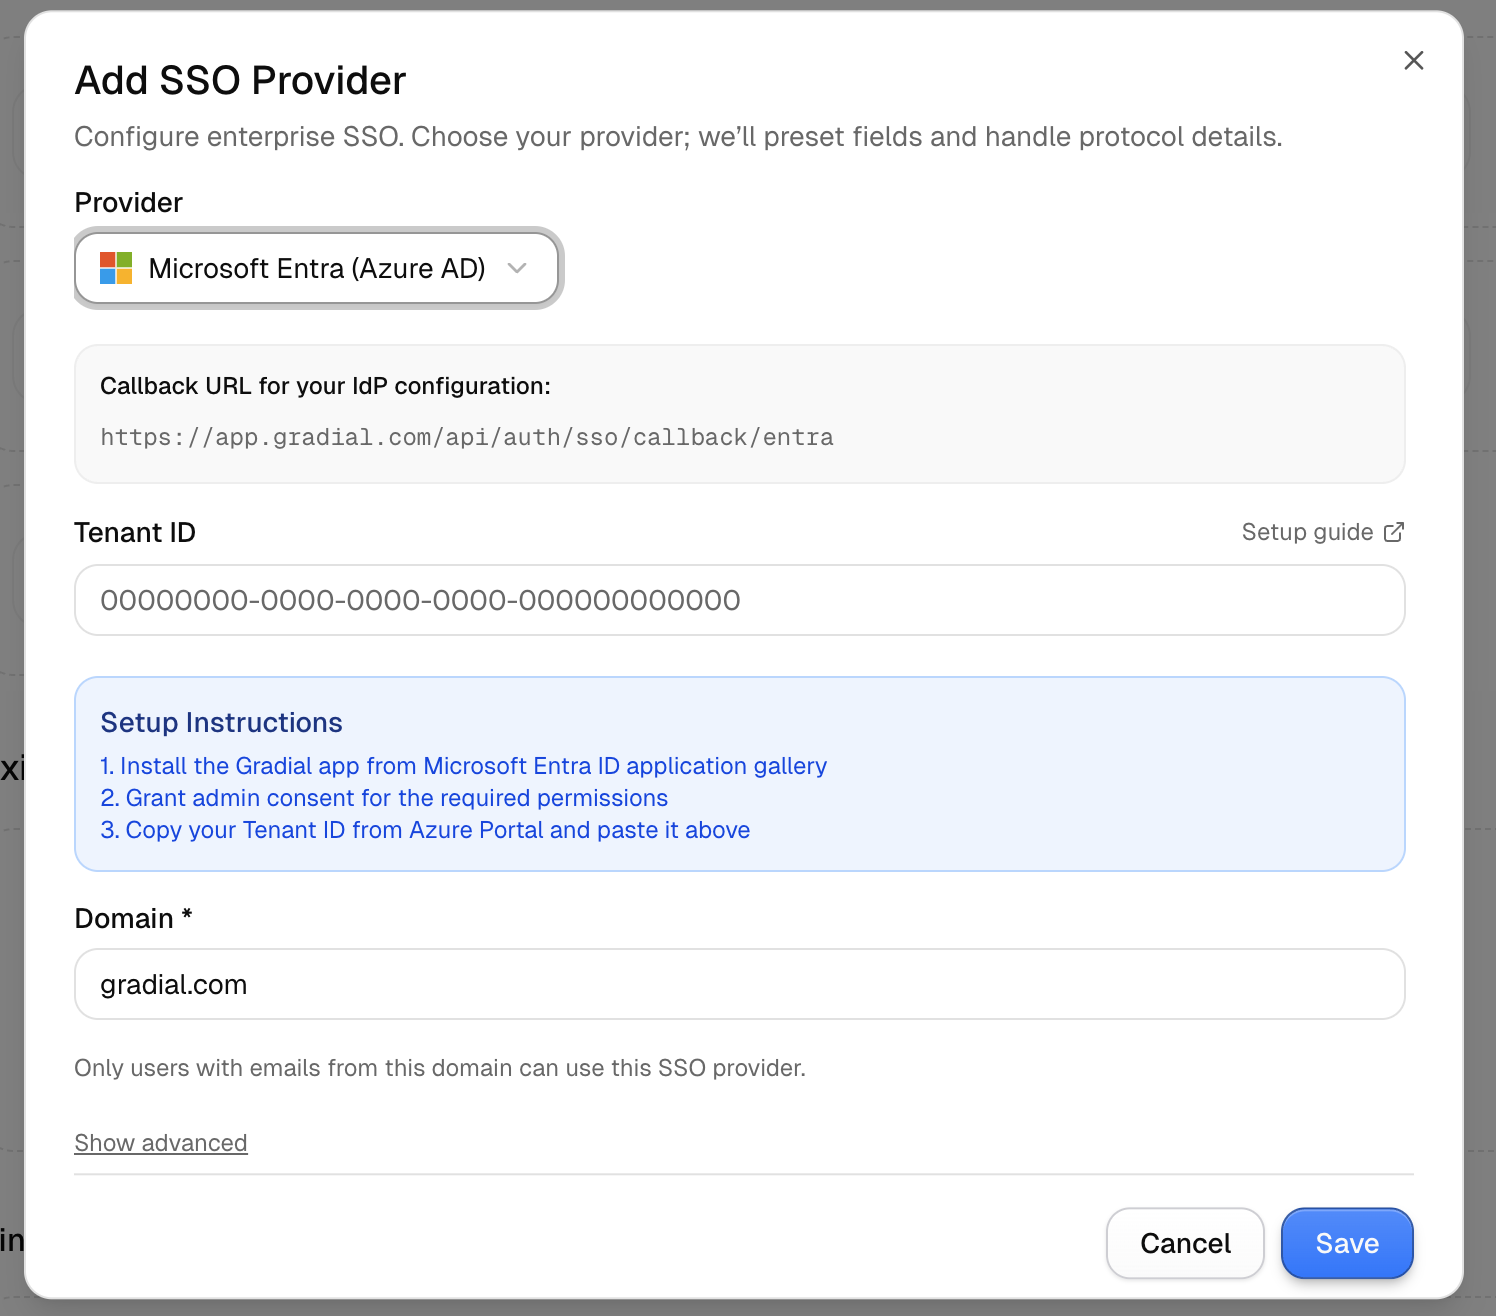
- Microsoft Entra ID (Azure AD) — recommended for Microsoft-based organizations
- Okta OIDC — streamlined integration for Okta customers
- Custom OIDC — for any OAuth2/OpenID Connect–compliant provider (e.g., Google, Ping, Auth0)
Option 1: Microsoft Entra ID Admin Setup (Recommended)
Overview
If your organization uses Microsoft Entra ID (formerly Azure Active Directory), this is the fastest and most secure setup method. Gradial is a verified publisher in the Microsoft Azure Marketplace, so your IT team can trust the flow and consent screen. Microsoft Entra ID: https://learn.microsoft.com/en-us/entra/identity/enterprise-apps/plan-an-application-integrationSteps to Enable SSO
- Log in to Gradial
Go to:https://app.gradial.com/login - Select Microsoft Login
Click Sign in with Microsoft - Authenticate as an Admin
Use a Microsoft Entra ID admin account. The first login will prompt a Microsoft consent screen. - Grant Permissions
Review the requested permissions and click Accept to authorize Gradial. - SSO Activated
Gradial links to your Microsoft tenant. All users from your domain (e.g.,@company.com) can now log in with Microsoft.

Option 2: Okta OIDC Setup
Overview
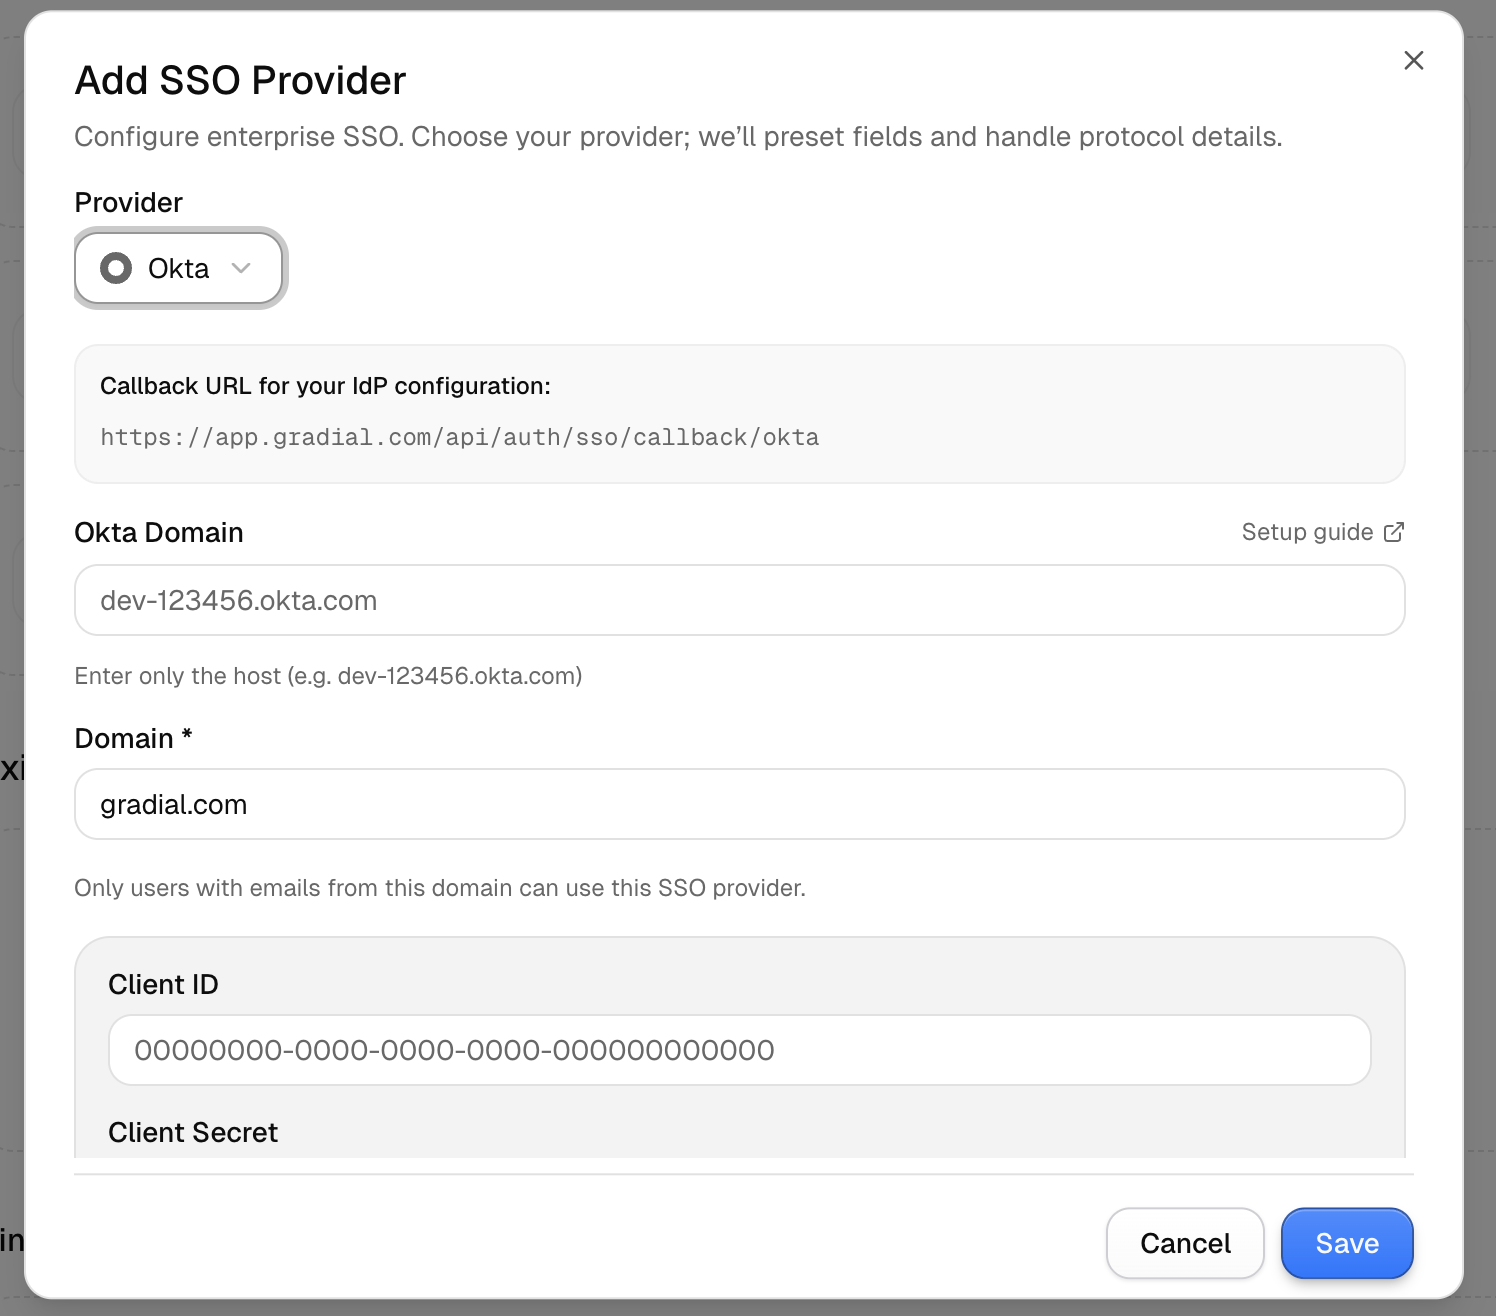
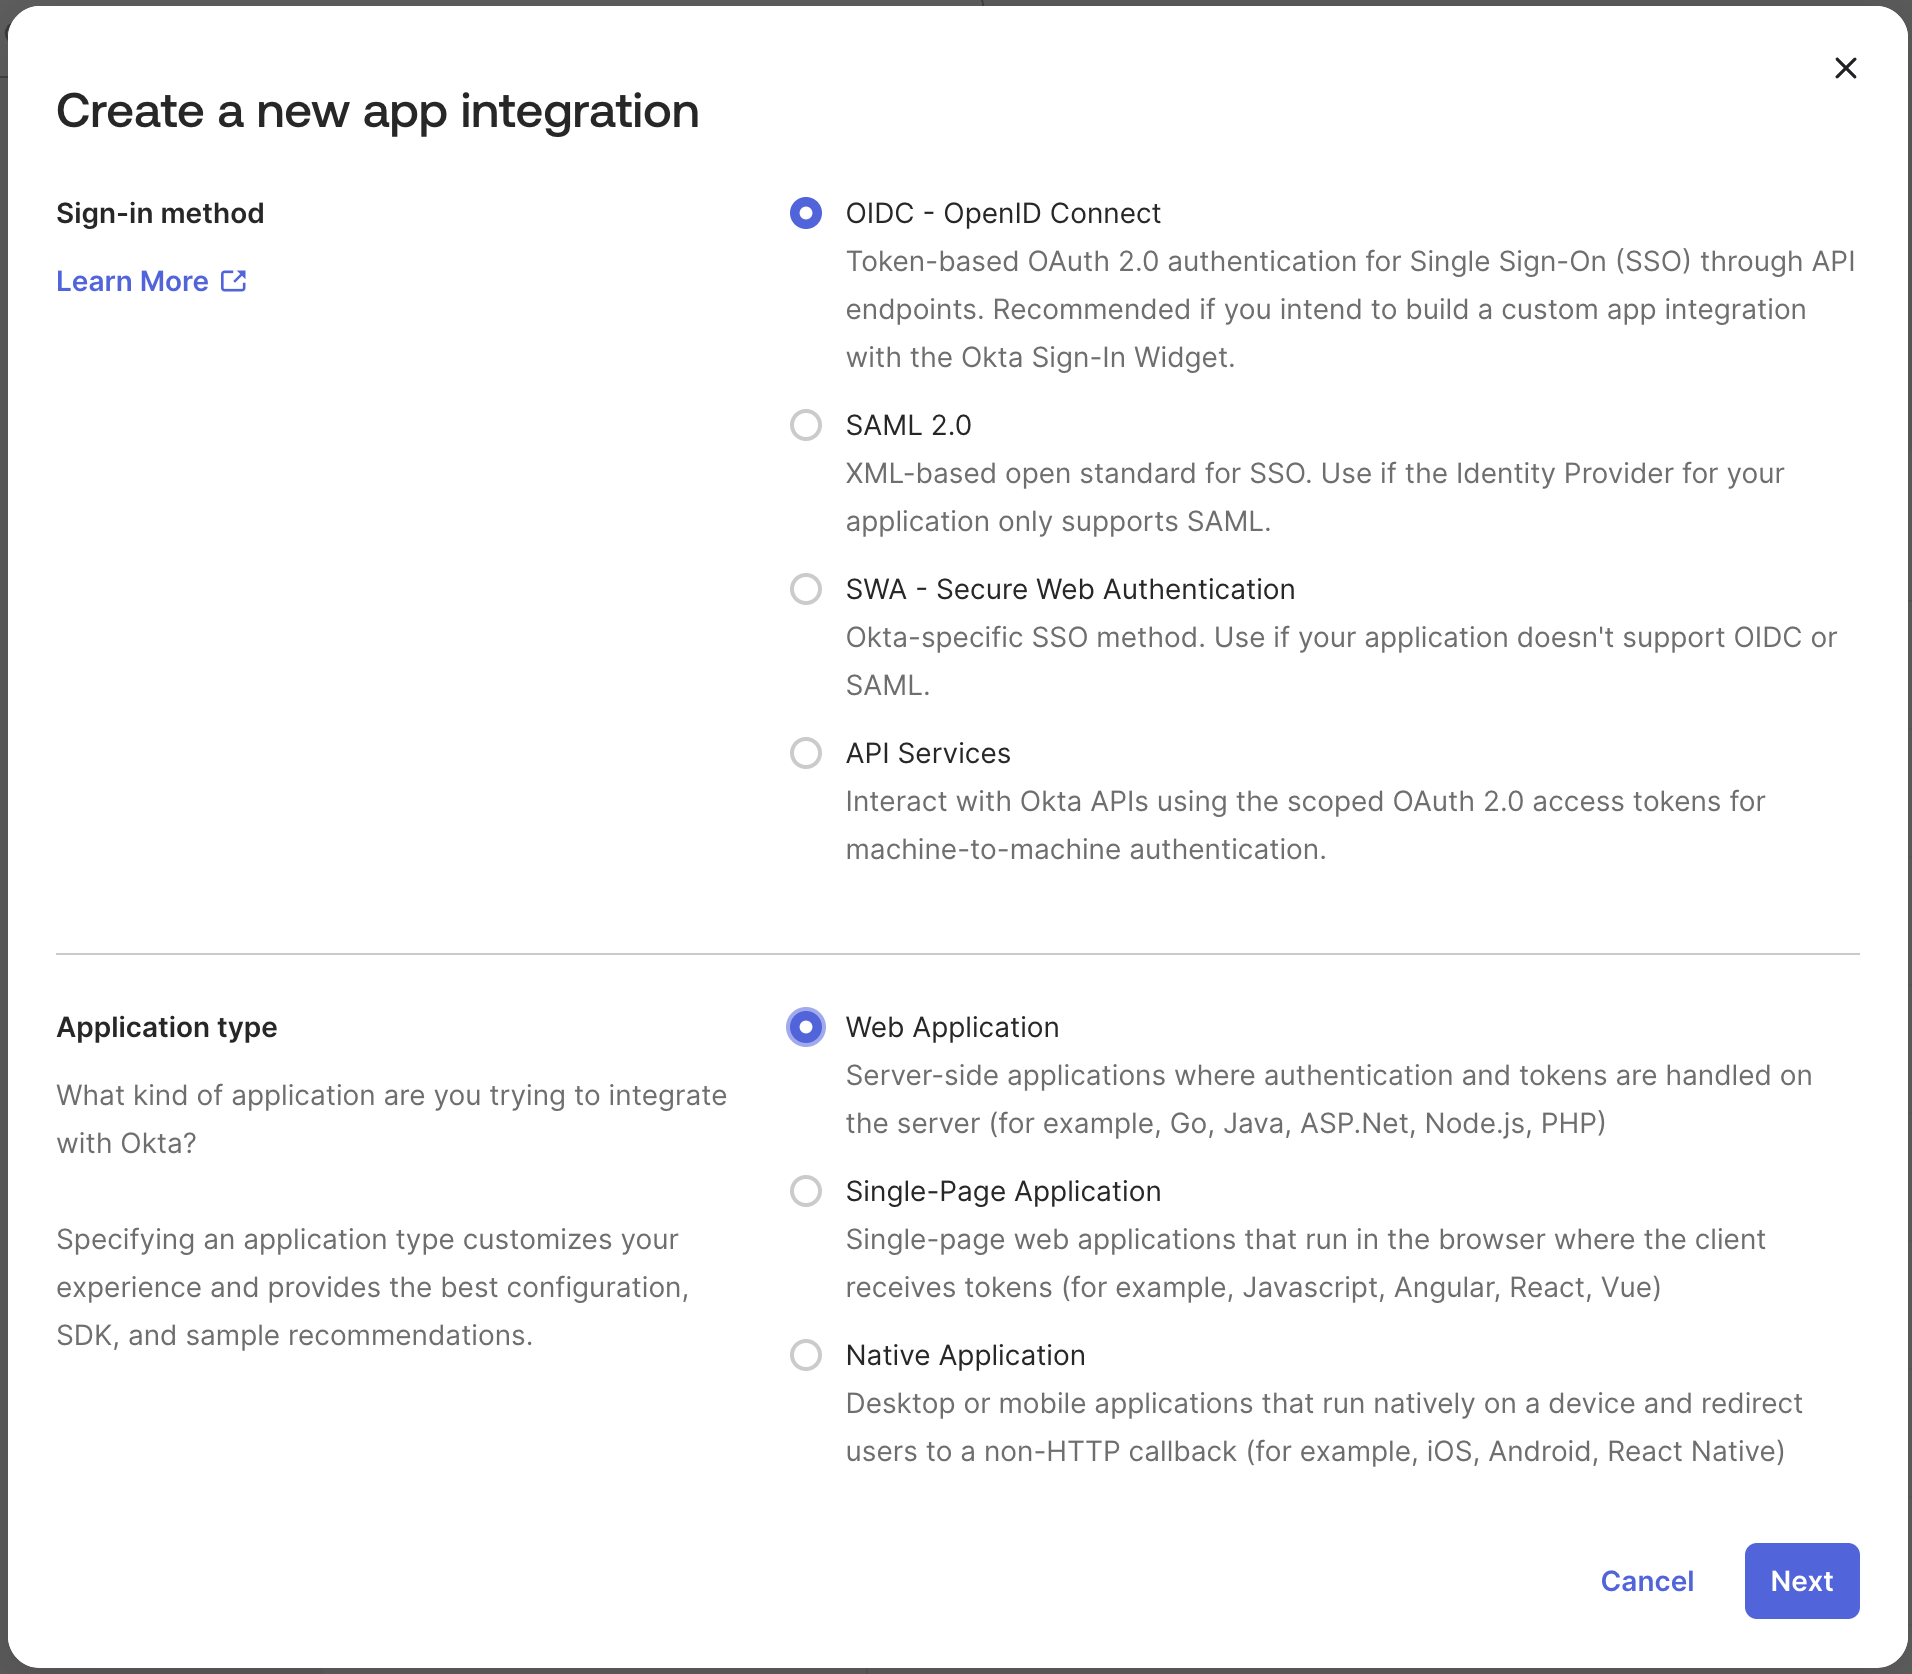
If your organization uses Okta as its identity provider, you can configure SSO with Gradial using OpenID Connect. Gradial provides a prebuilt Okta option to simplify setup. Okta Documentation:https://help.okta.com/en-us/content/topics/apps/apps_apps.htmNote: Some organizations require Gradial to be explicitly added as an authorized Okta application. If you encounter issues, check with your Okta administrator.
Steps to Enable SSO
- In Gradial, go to Settings → Integrations → Single Sign-On
- Select Okta
- Copy the Callback URL from Gradial into your Okta app configuration
- Enter your Okta Domain (e.g.,
dev-123456.okta.com) - Enter your Organization Domain (e.g.,
gradial.com) - Paste your Client ID and Client Secret from Okta
- Save and test login


.png?fit=max&auto=format&n=jhLMWpHnXzFEqy8q&q=85&s=daf79fdee7b958672f356dd15ebcb0c2)
.png?fit=max&auto=format&n=jhLMWpHnXzFEqy8q&q=85&s=f0781e852f120cdcbd2097ca482742da)
.png?fit=max&auto=format&n=jhLMWpHnXzFEqy8q&q=85&s=913ed1177decebd313d15365e9eb30cb)
.png?fit=max&auto=format&n=jhLMWpHnXzFEqy8q&q=85&s=4c676b83fdc2f57363965df213e9520a)
Option 3: Custom OIDC Setup
Overview
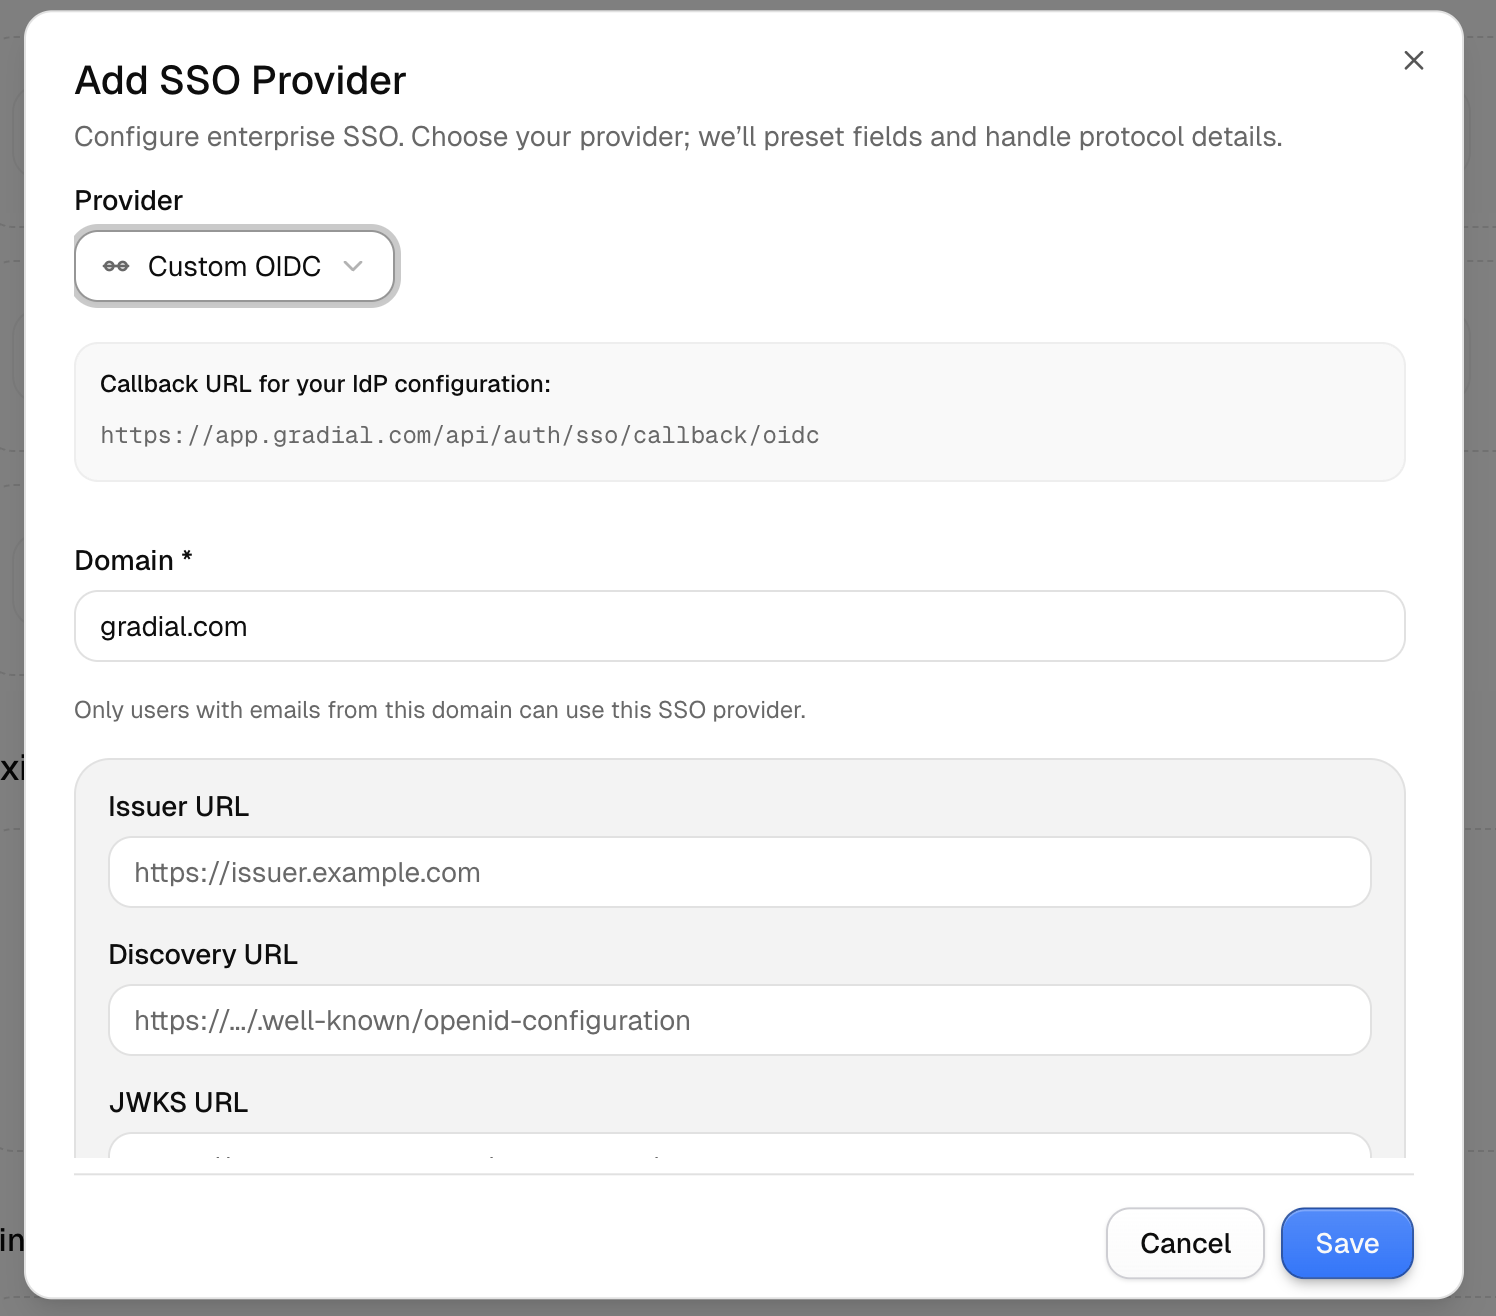
Use this method if your organization uses a non-Microsoft, non-Okta identity provider that supports OpenID Connect (e.g., Google, Ping, Auth0).Steps to Enable SSO
- In Gradial, go to Settings → Integrations → Single Sign-On
- Select Custom OIDC
-
Enter your Domain (e.g.,
gradial.com) -
Provide:
- Issuer URL (e.g.,
https://accounts.google.com) - Discovery URL (e.g.,
https://accounts.google.com/.well-known/openid-configuration) - Client ID and Client Secret from your IdP
- (Optional) Scopes (default:
openid, email, profile)
- Issuer URL (e.g.,
-
Save and test login

Getting Help
You can complete these integrations as a self-serve setup in Gradial.Important: At least one admin account must be set up with a username and password (not SSO) to initially access the integrations screen and complete setup.If you prefer assistance, reach out to your Customer Solutions team, who can walk through configuration and validation with you.
Additional Notes
- Your IdP must support OpenID Connect and authorization code flow
- Share secrets only through secure channels
- Keep at least one password-based admin account as a backup in case of SSO misconfiguration