

- Microsoft Entra ID (Azure AD) — for Microsoft-based organizations
- Okta OIDC — streamlined integration for Okta customers
- Custom OIDC — for any OAuth2/OpenID Connect–compliant provider (e.g., Google, Ping, Auth0)
SSO handles authentication — whether a user can log in. To automatically create, update, and deactivate Gradial accounts (and sync organization roles and workspace access) from your identity provider, see SCIM User Provisioning.
Add the provider in Gradial
Every option starts in Gradial and ends with giving users access. You need a Gradial account with the Owner or Admin role. Until SSO is configured, sign in with email and password.- Go to Settings → SSO and click Add Provider.
- Under Provider, select your identity provider.
- Under Email Domains, add each domain your users sign in with, such as
company.com. - Fill in the provider-specific fields from the matching option below.
Option 1: Microsoft Entra ID
Gradial uses its own multi-tenant Microsoft Entra application. Connect your tenant by entering its Tenant ID in Gradial — no application registration required on your side.What you will need
- Your Microsoft Entra Tenant ID, available on the Overview page of your Microsoft Entra admin center.
- An Entra Global Administrator or Privileged Role Administrator. Only these roles can consent on behalf of your organization from the sign-in prompt.
Steps to enable SSO
- Add the provider in Gradial, select Microsoft Entra (Azure AD), enter your Tenant ID, and click Save. The Callback URL shown in the dialog needs no action for Entra.
-
Have your Entra admin go to
https://app.gradial.com, enter their work email, and click Continue. The email must be on one of the provider’s Email Domains: Gradial picks the sign-in method by email domain, so an address on another domain, such ascontoso.onmicrosoft.com, gets the password prompt instead of Microsoft. -
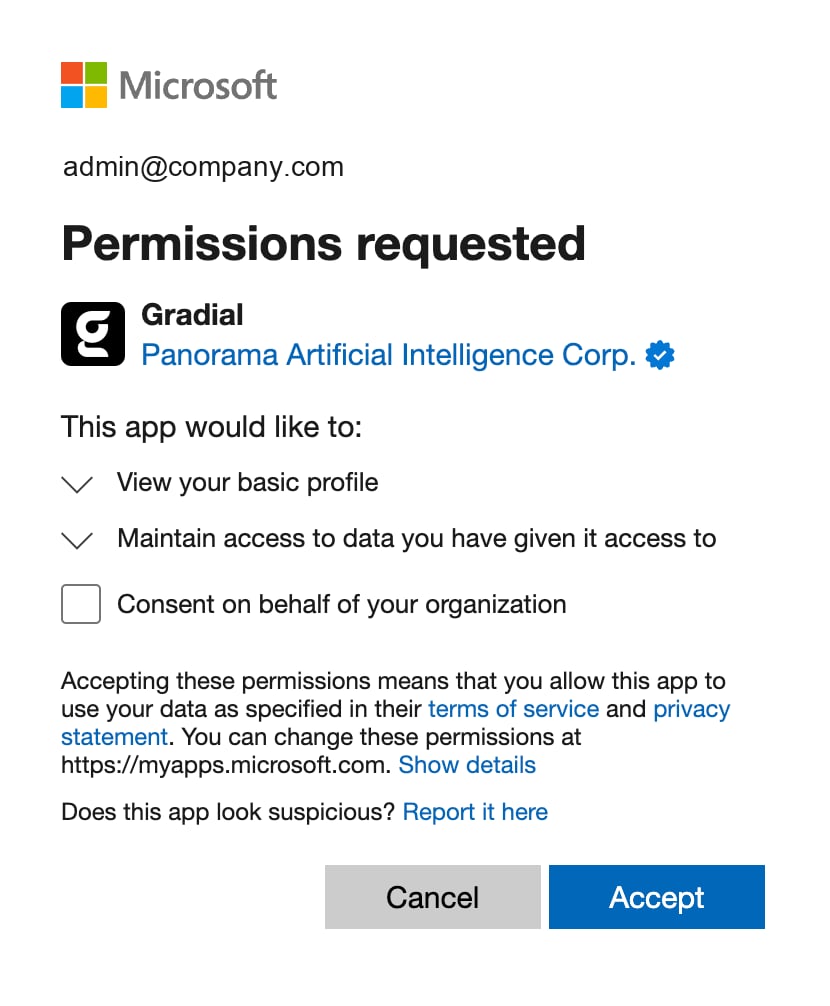
On the Microsoft Permissions requested screen, the admin must check Consent on behalf of your organization before clicking Accept.
Troubleshooting
Users are asked to consent or told they need admin approval
Users are asked to consent or told they need admin approval
Consent was likely accepted without Consent on behalf of your organization. Check Entra ID → Enterprise apps → All applications → Gradial → Permissions for tenant-wide admin consent. If it is missing, an authorized Entra admin can click Grant admin consent.
Gradial is not listed under Enterprise apps
Gradial is not listed under Enterprise apps
The Enterprise application may not have been created in your tenant yet. Have an authorized Entra admin retry Microsoft sign-in and accept the consent prompt if one appears.
Option 2: Okta OIDC
If your organization uses Okta as its identity provider, you can configure SSO with Gradial using OpenID Connect. Gradial provides a prebuilt Okta option to simplify setup. Okta documentation: https://help.okta.com/en-us/content/topics/apps/apps_apps.htmNote: Some organizations require Gradial to be explicitly added as an authorized Okta application. If you encounter issues, check with your Okta administrator.
Steps to enable SSO
- Add the provider in Gradial and select Okta.
- Copy the Callback URL shown in the dialog into your Okta app configuration.
- Enter your Okta Domain (e.g.,
dev-123456.okta.com), without the-adminsuffix. - Paste your Client ID and Client Secret from Okta.
- Click Save.
Option 3: Custom OIDC
Use this method if your organization uses a non-Microsoft, non-Okta identity provider that supports OpenID Connect (e.g., Google, Ping, Auth0).Steps to enable SSO
- Add the provider in Gradial and select Custom OIDC.
- Copy the Callback URL shown in the dialog into your IdP’s app configuration.
- Provide:
- Issuer URL (e.g.,
https://accounts.google.com) - Discovery URL (e.g.,
https://accounts.google.com/.well-known/openid-configuration) - Client ID and Client Secret from your IdP
- (Optional) Scopes (default:
openid, email, profile)
- Issuer URL (e.g.,
- Click Save.
Give users access and test sign-in
After the provider is saved (and, for Microsoft Entra ID, consent is granted):- Invite users from Settings → People. Gradial doesn’t support just-in-time (JIT) provisioning, so SSO sign-in does not create Gradial accounts. With Microsoft Entra ID, you can also set up SCIM later to provision users automatically.
- Have a user sign in with their work email at
https://app.gradial.com. After following the presented steps, they should land in the Gradial org.
"Account Setup Required" after sign-in
"Account Setup Required" after sign-in
If it says no Gradial account has been provisioned for this email, invite the user from Settings → People.
Multiple SSO Configurations
Gradial supports multiple SSO configurations for a single organization—useful for organizations spanning multiple geographies with separate identity providers, or when a managed service provider is supporting your implementation. To add additional SSO connections, repeat the setup steps for each identity provider.Additional Notes
- Self-serve setup requires an IdP that supports OpenID Connect and authorization code flow. If your IdP only supports SAML 2.0, contact your Gradial team
- Share secrets only through secure channels
Related
- SCIM User Provisioning → — automatically provision users, roles, and workspace access from your IdP
- Roles & Permissions →
- Adding Team Members →